Instructors Guide
Instructors Guide
CurtainUp is not just a place for the technical department to complete training. It is also a full course platform for the people who build that training. As an instructor, you can create a course from nothing, structure it into lessons and quizzes, publish it to the right audience, track who has completed it, and issue a certificate at the end, all from inside the same site your learners already use.
This guide covers how to build and publish a course, how to add News and Training Report posts, how to manage your students, and then gives a complete tour of everything else the platform can do.
Adding a course
Follow these steps to take a course from a blank page to fully published. This covers the minimum needed for a working course. The Full Feature Tour section covers every option in more detail.
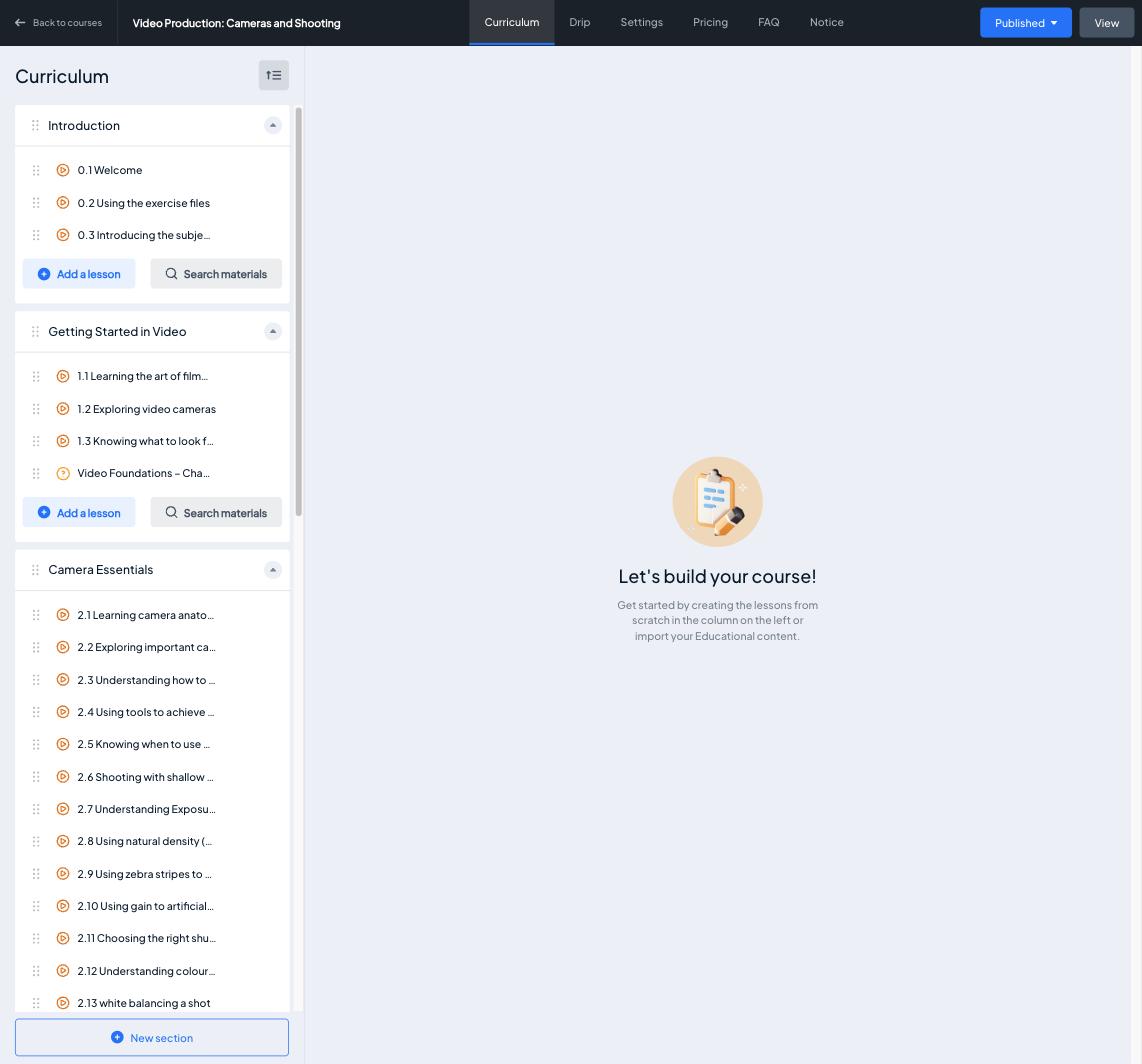 Click the image to enlarge it
- Open Course BuilderFrom your instructor dashboard, select Courses, then Add New Course.
- Add the course detailsGive the course a title, a short description, a category, and a featured image. This is what learners see before they enrol.
- Build the curriculumAdd sections, then add lessons inside each section. A lesson can be a video, audio, slides, a PDF, or plain text. Add a quiz at the end of a section if you want to check understanding.
- Set requirements and orderDecide whether lessons must be completed in order, and whether an earlier course is required before this one can be started.
- Set course accessEvery course on CurtainUp is free to enrol. There is no payment step. Access can still be limited to a specific department if the course should not appear for everyone.
- Preview, then publishPreview the course as a student would see it, check the curriculum reads correctly, then set the status to Published.
Adding News and Training Report posts
The News page and the Tech Training Reports page are not separate systems. They are both built from ordinary WordPress posts, and the page a post appears on is decided entirely by the category chosen when it is written. A post placed in a News category shows on the News page, a post placed in a Training category shows on the Tech Training Reports page, and either one also appears automatically in the latest items feed on the site's front homepage, with no extra step needed. The walkthrough below covers every screen involved, from opening a new post through to seeing it live, with its own screenshot for each step.
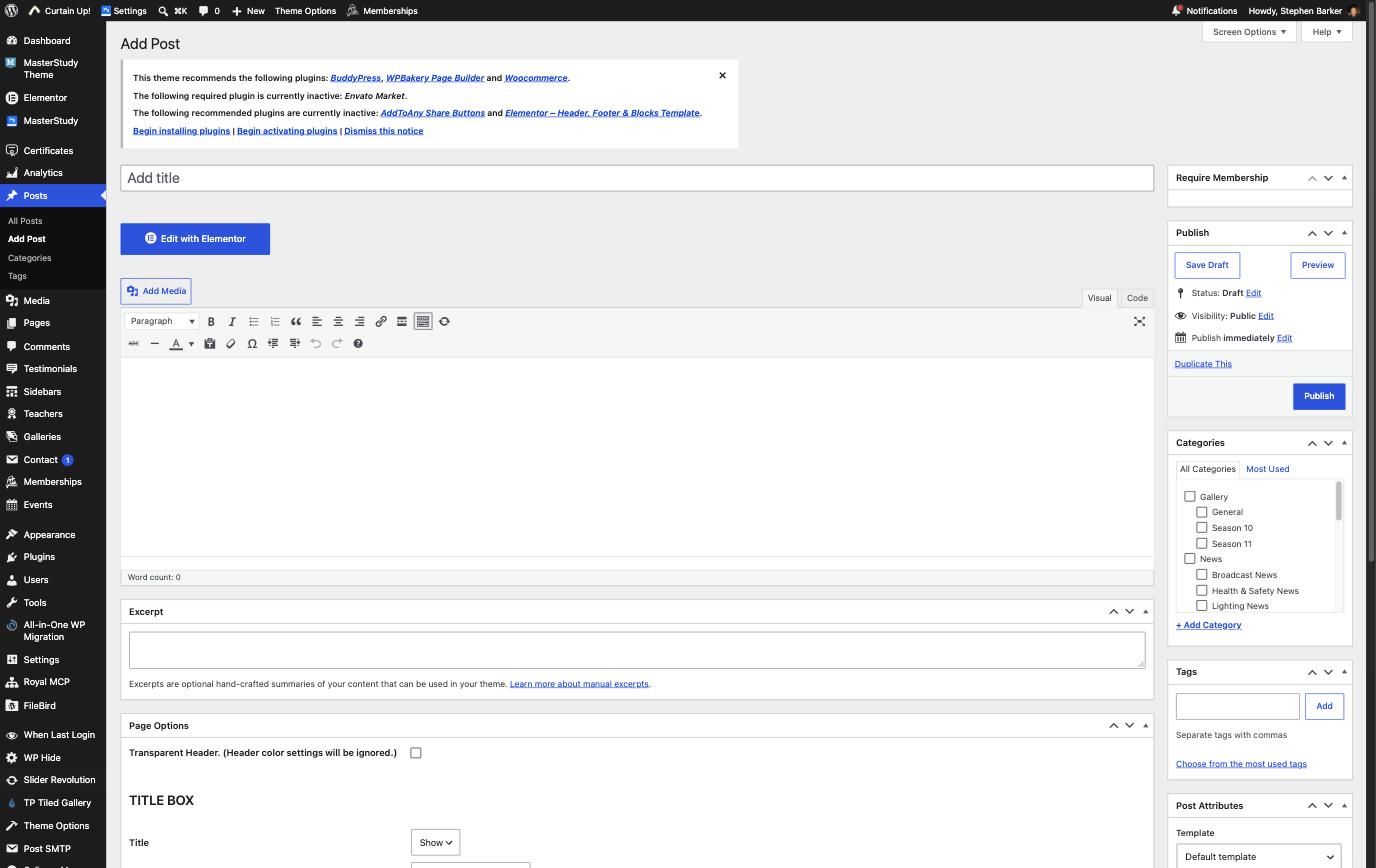
Click the image to enlarge it
- Open Posts, then Add NewIn the admin menu on the left, hover over Posts, then select Add New. This is the standard WordPress Posts screen, and is separate from the Courses area used for training courses.
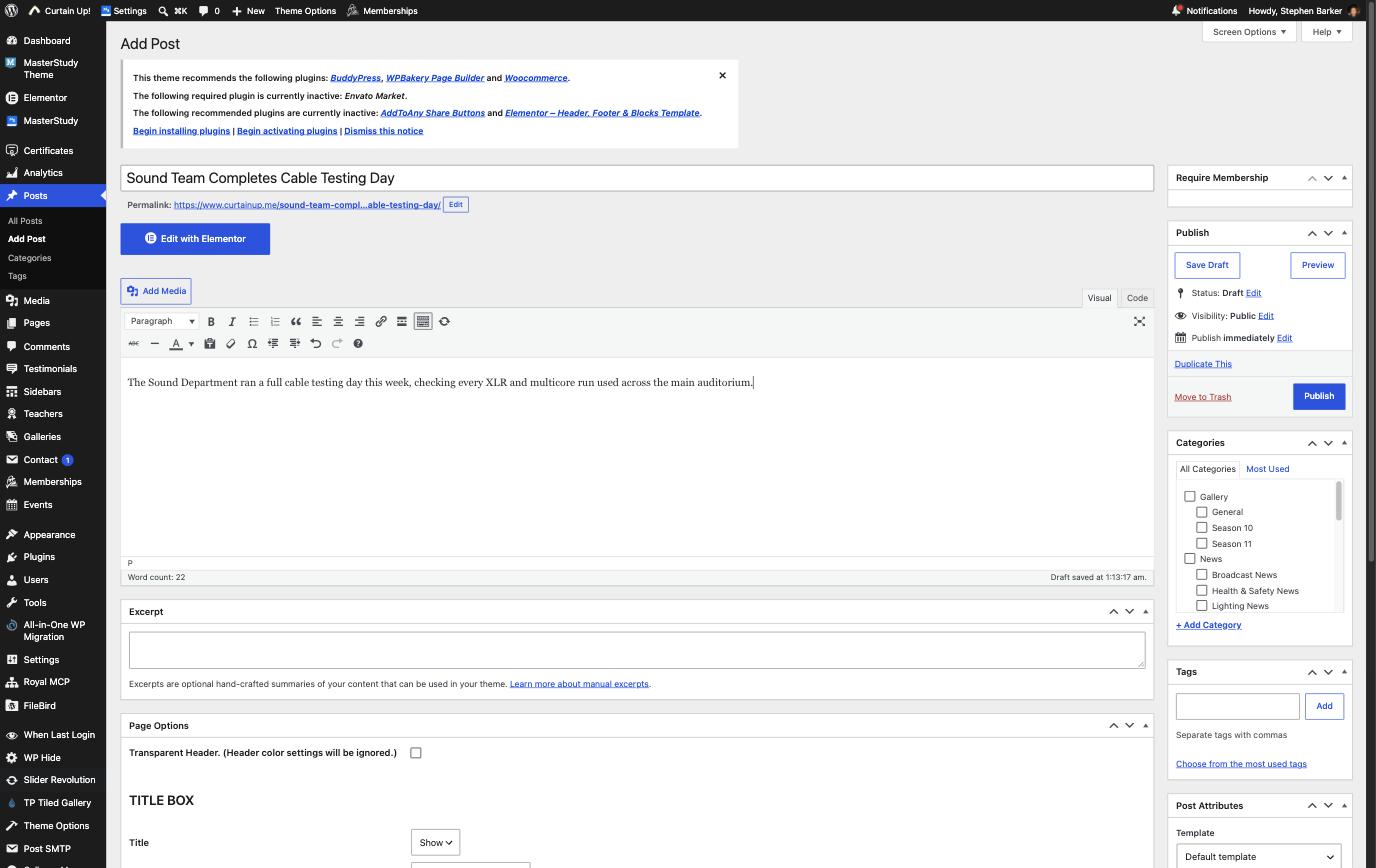
Click the image to enlarge it
- Give the post a clear titleType a short, specific title into the field at the top of the editor, for example "Sound Team Completes Cable Testing Day" rather than something generic. This title is what appears on the News or Training Reports page and on the homepage.
Click the image to enlarge it
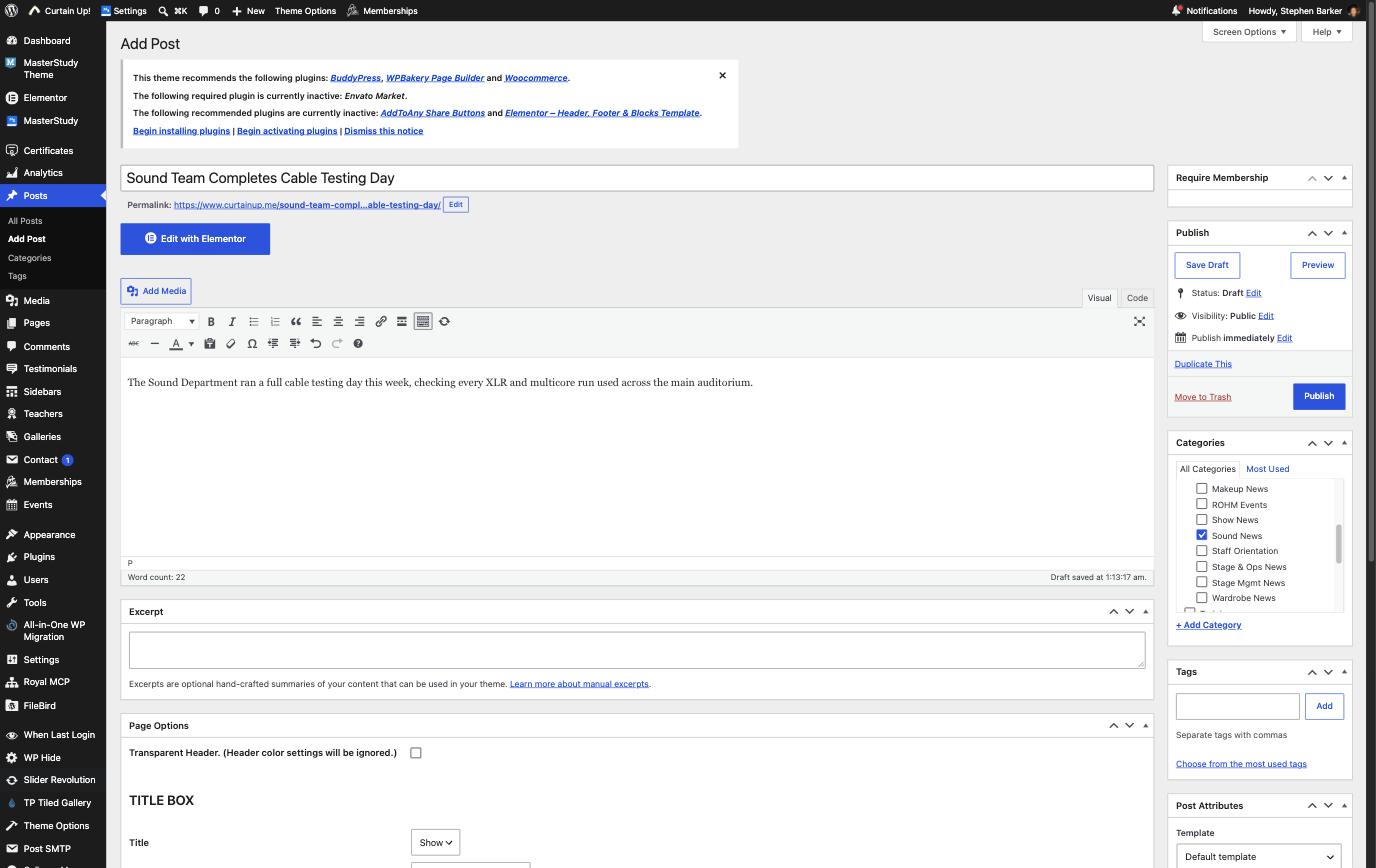
- Choose the right categoryIn the Categories box on the right of the editor, tick News for a news style update or Training for a training report, then tick your department underneath it, for example Sound News or Sound under Training. This tick is what decides which page the post appears on. Picking the wrong parent category, or skipping this step, is the most common reason a post does not show up where it is expected.
Click the image to enlarge it
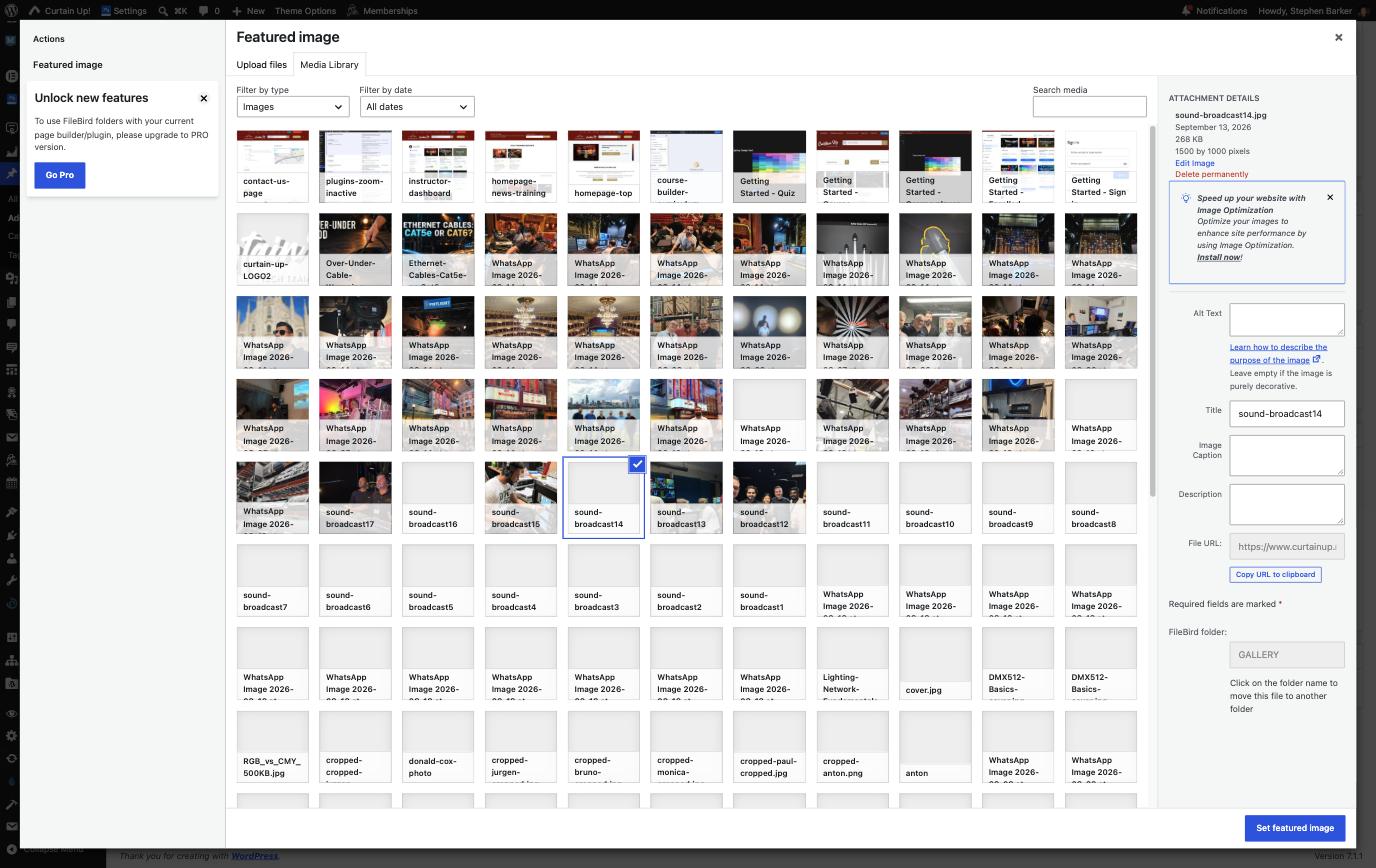
- Add a photo to the body textIf there is a photo of the work described, place the cursor in the content area and use Add Media to insert it directly into the text. This is separate from the featured image covered in the next step, and is useful for a second photo partway through the post.
Click the image to enlarge it
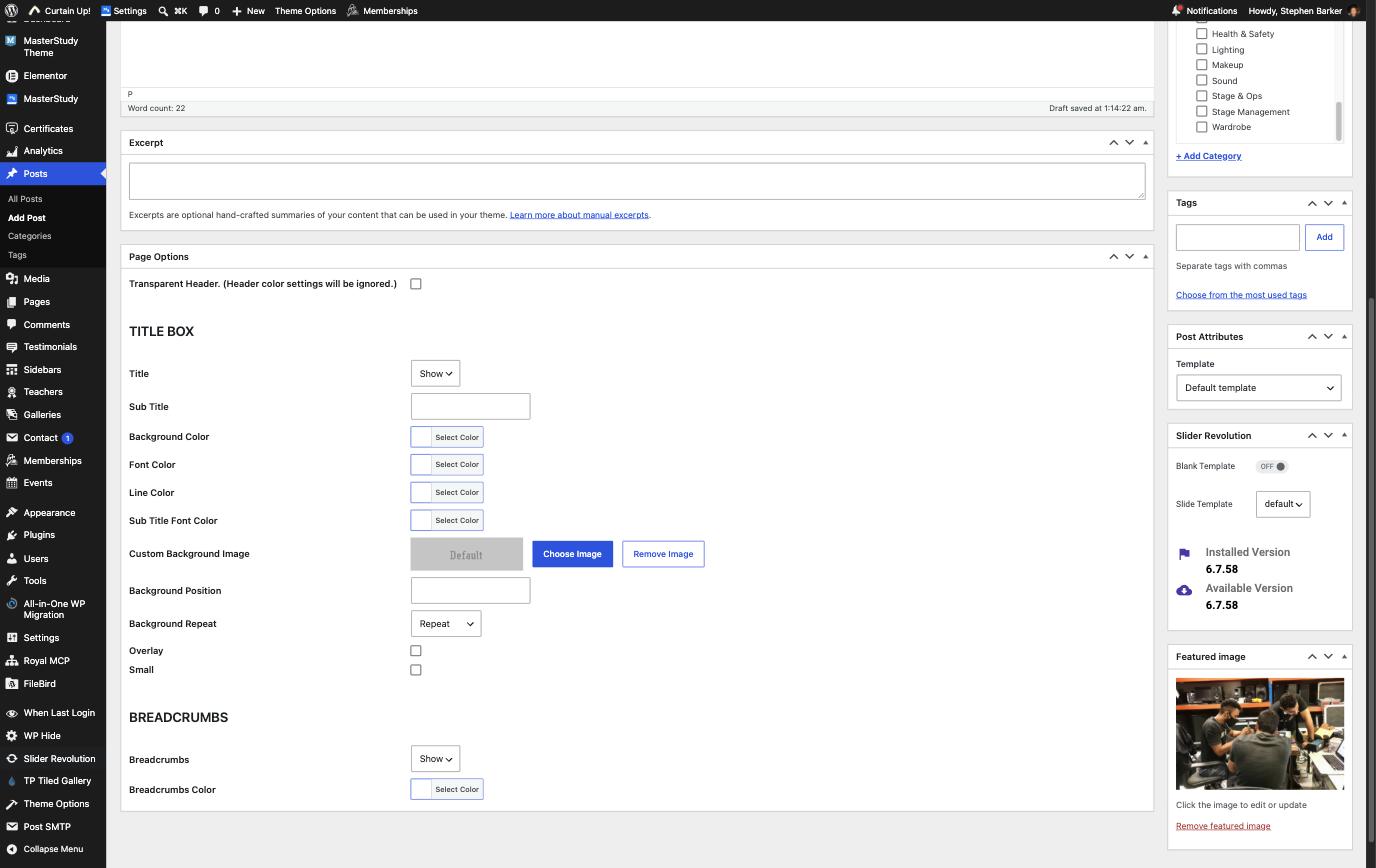
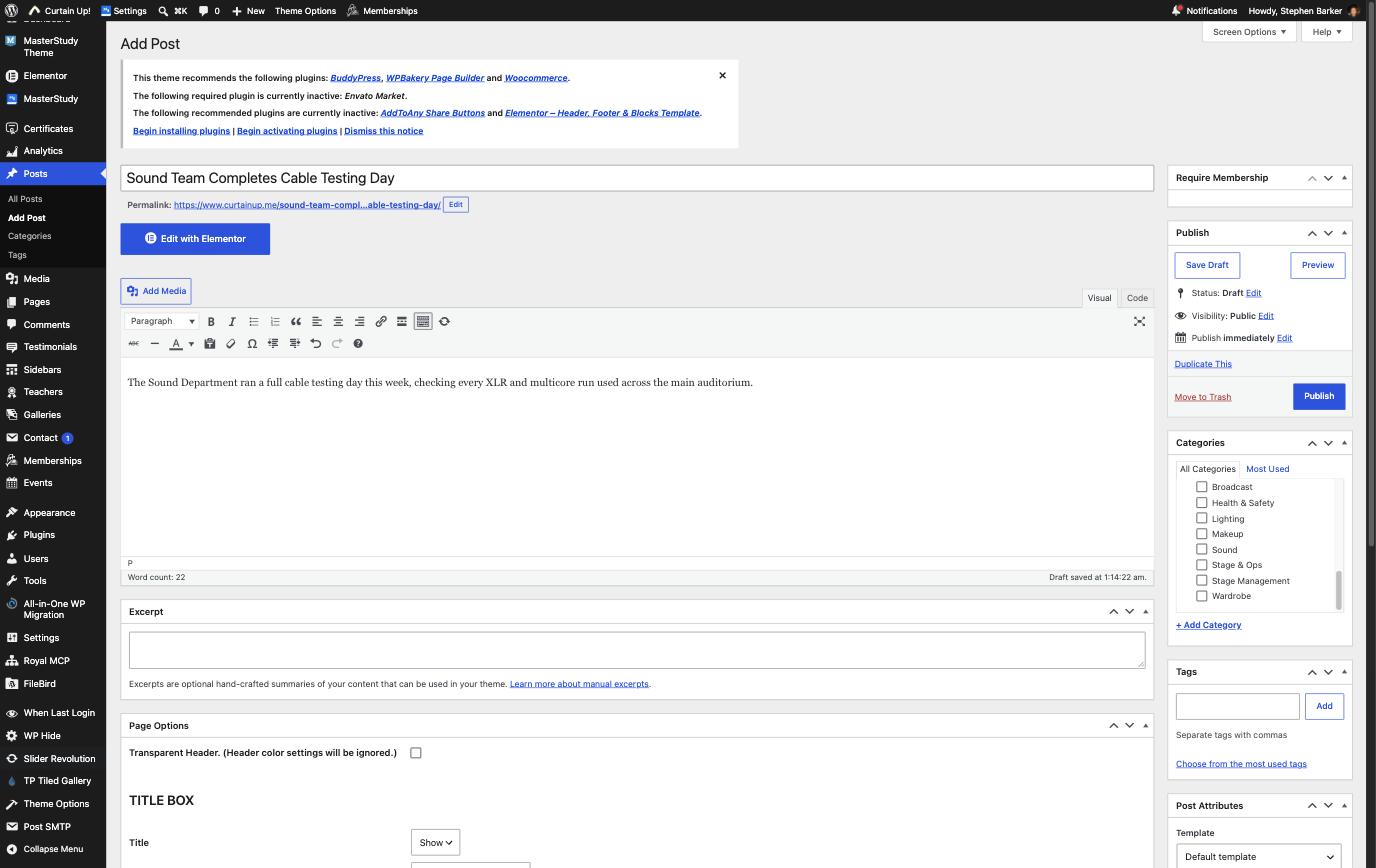
- Set a featured imageFurther down the right hand sidebar, select Set featured image, then choose a photo from the Media Library or upload a new one. This is the image used for the post's thumbnail on its page and on the homepage, so it is worth setting even when a photo already appears in the body text.
Click the image to enlarge it
- Publish the postOnce the title, category and content are ready, select Publish in the Publish box at the top of the right hand sidebar, then select Publish again to confirm. The post goes live immediately.
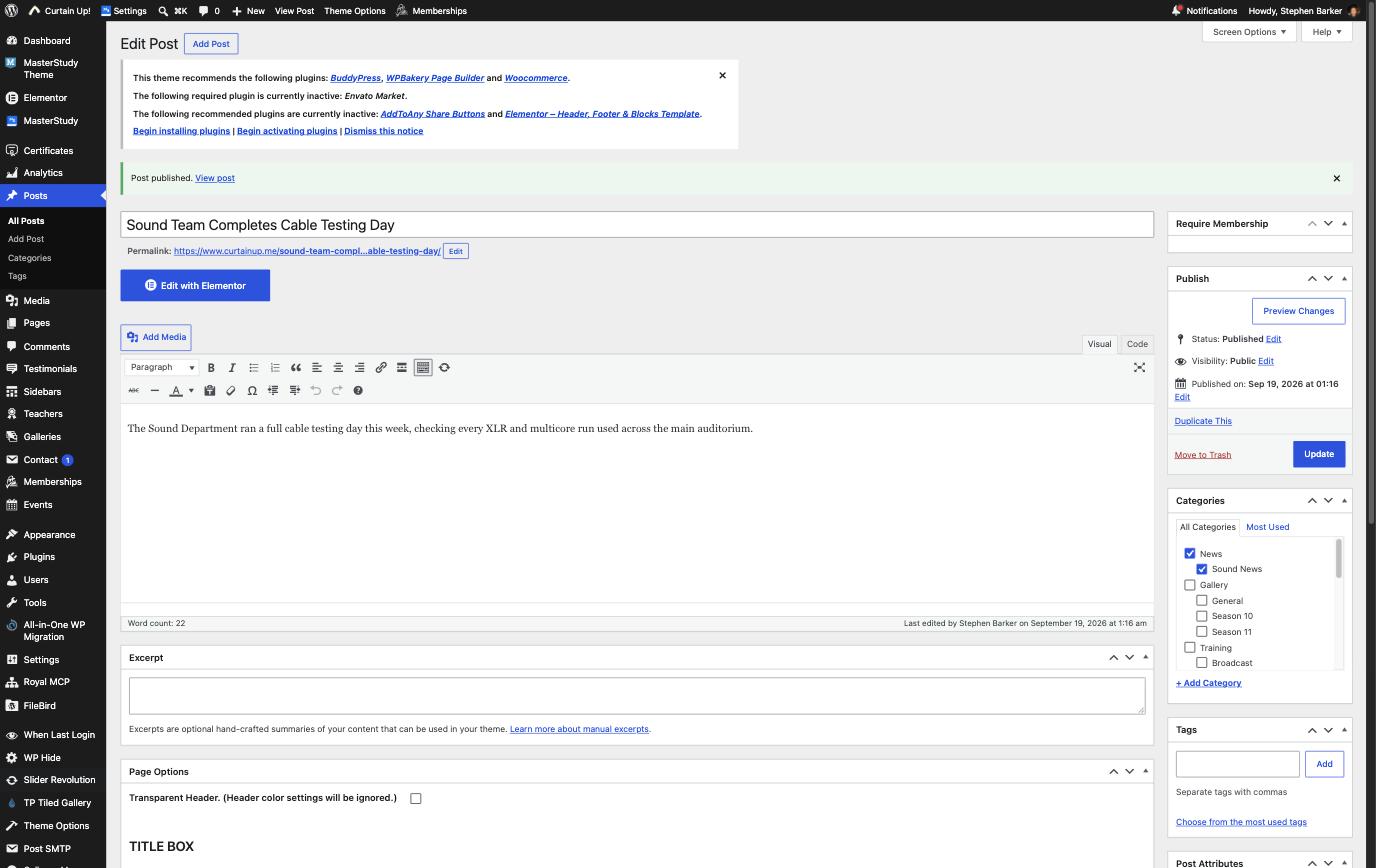
Click the image to enlarge it
- Confirm the post is liveAfter publishing, the editor reloads and shows a confirmation with a View Post link. Select it to open the post on the live site and check that the title, photo and text all appear as expected.
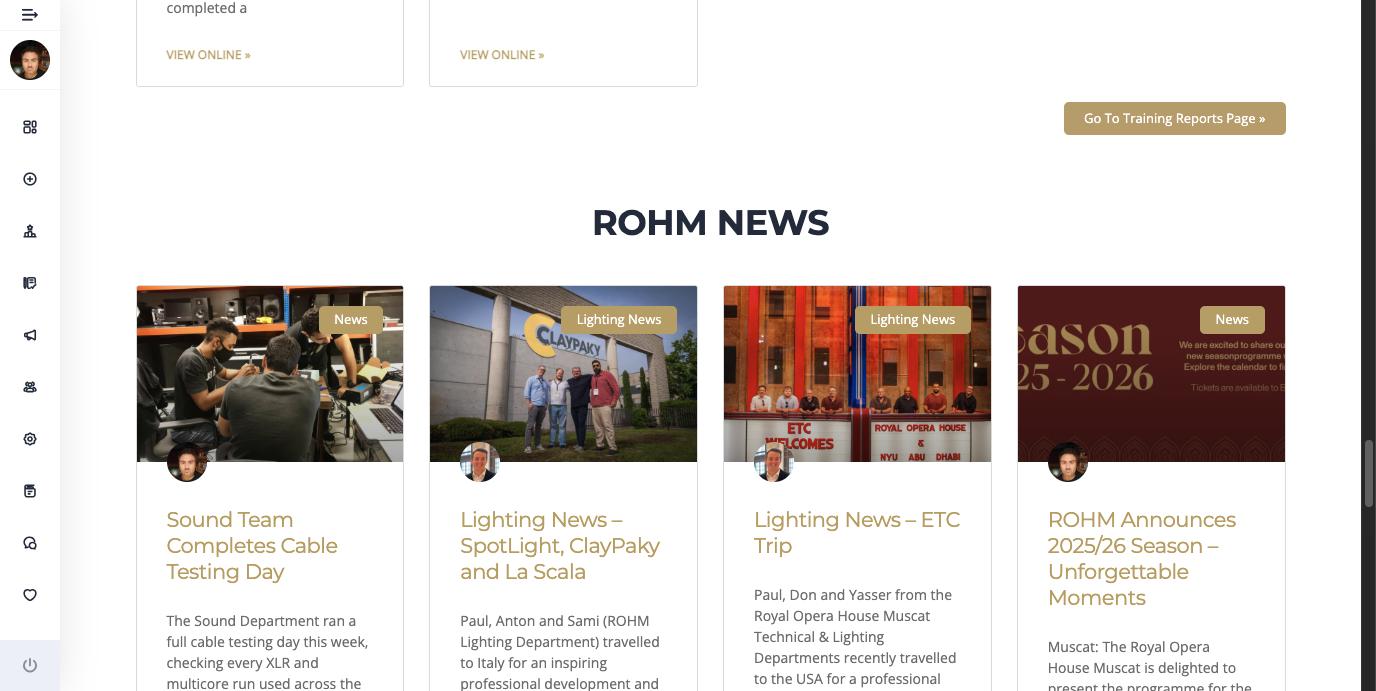
Click the image to enlarge it
- Find it on its page and the homepageThe post now appears automatically on the page that matches its category, News or Tech Training Reports, and in the latest items feed on the site's front homepage. No extra step is needed to add it to either location, placement is entirely automatic and based on the category chosen earlier.
Course and student admin
The instructor dashboard is a separate, private area from the learner dashboard. It brings together every course you own, every student enrolled in them, your results, your messages, and your certificates.
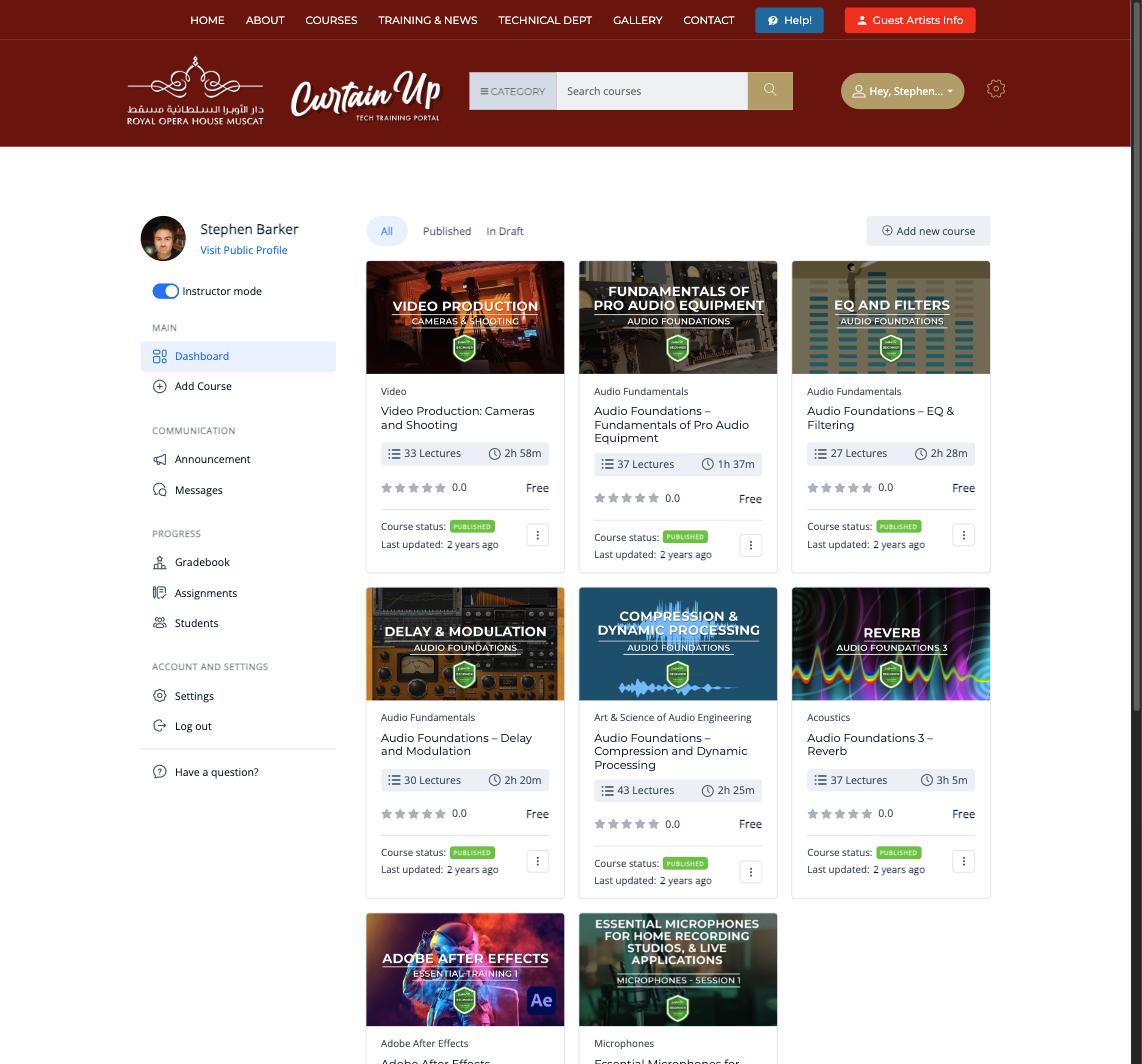 Click the image to enlarge it
- My CoursesEvery course you have created, its status, and quick access to edit it.
- StudentsEveryone enrolled across your courses, with their progress and completion status.
- Quiz attemptsEvery quiz result, including failed attempts and retakes.
- AssignmentsSubmissions waiting to be reviewed and graded.
- GradebookA single view of every student's results across a course.
- Messages and announcementsDirect messages with individual students, and course wide notices sent to everyone enrolled.
- CertificatesIssued automatically once a student completes a course and passes its quizzes. Certificate designs are already set up for each department, so there is nothing to build here, only students to check.
- ProfileYour public instructor profile, shown to learners browsing the course catalogue.
Full feature tour
Course creation is one part of a much larger system. This section is a complete tour of what CurtainUp already includes, beyond the training pages themselves.
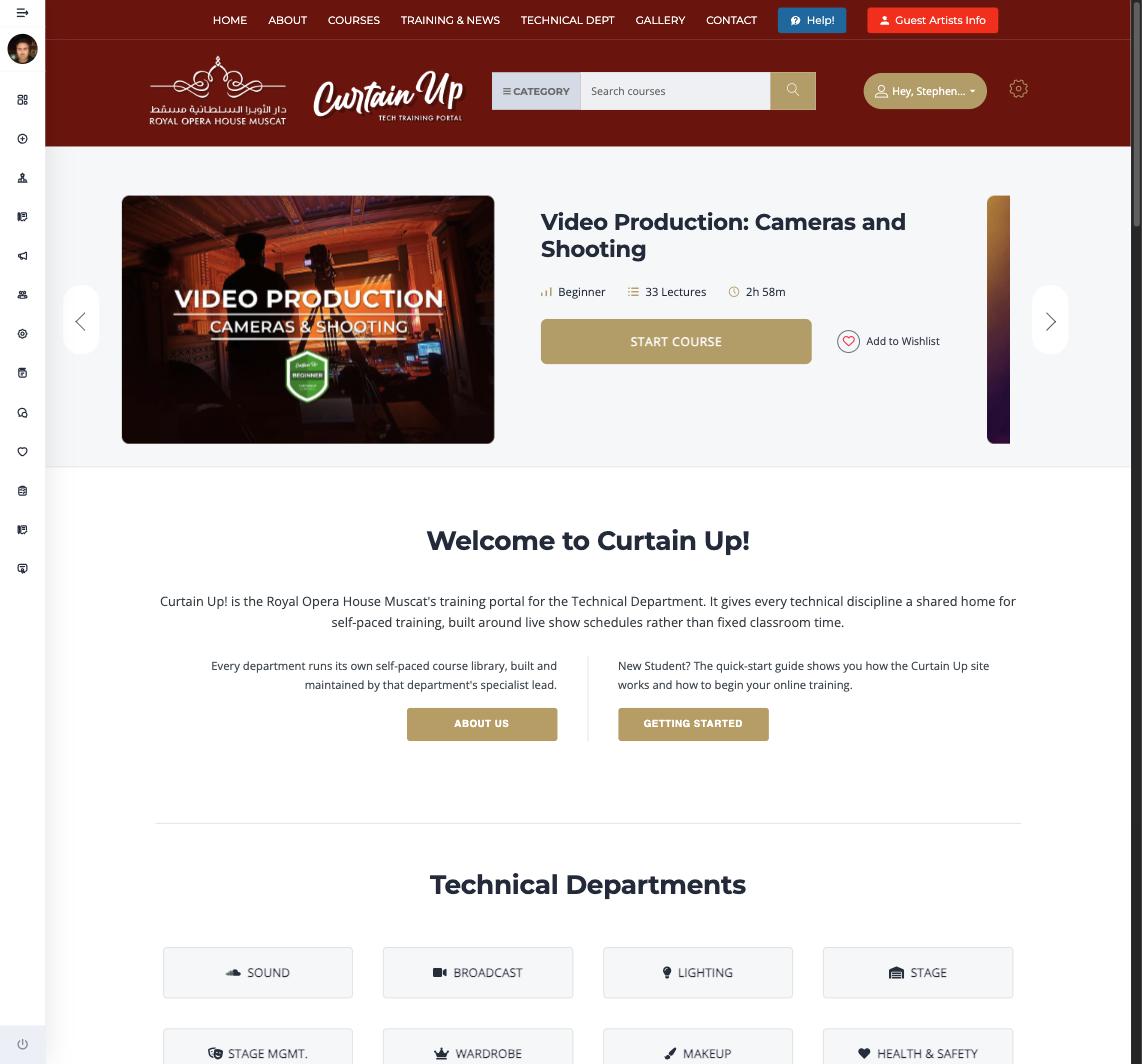 Click the image to enlarge it
Inside the Course Builder
- Drag and drop structureReorder sections and lessons by dragging them into place.
- Mixed content types in one courseVideo, audio, text, slides, and PDF lessons can all sit side by side in the same curriculum.
- Co-instructorsA second instructor can be added to a course, useful for shared departmental subjects.
- Course bundlesSeveral related courses can be grouped and enrolled in together.
Curriculum, drip content, and prerequisites
- QuizzesMultiple choice quizzes with a configurable pass percentage, placed anywhere in the curriculum.
- AssignmentsOpen ended tasks that a student submits and an instructor grades by hand.
- PrerequisitesA course, or a specific lesson, can be locked until an earlier one is completed.
- Drip contentLessons can be released on a schedule, days after enrolment or on a fixed date, rather than all at once.
- Lesson notesLearners can save personal notes against a lesson, for later reference.
Enrolment and access
- Manual assignmentCourses can be assigned directly to a learner's account, as already happens for required departmental training.
- Group enrolmentA batch of learners, such as a department, can be enrolled in a course at once.
- Department restricted accessA course can be limited to a specific technical department where it should not appear for everyone.
The rest of the platform
- Personal learner dashboards with enrolled courses, progress, quizzes, and certificates
- A searchable, filterable course catalogue across every technical department
- A course player with curriculum navigation, video, notes, and quiz delivery
- A quiz engine with configurable pass marks and unlimited retakes
- A certificate system with department specific designs
- Department pages for Lighting, Sound, Stage, Stage Management, Wardrobe and Makeup, and Health and Safety, each with its own photo galleries
- A Latest News section and a Training Reports section, both fed by ordinary posts
- A guest artists information area
- A contact and enquiry system connected to the site administrator
- Full mobile support, so training can be completed on a phone or tablet
- User accounts and departmental access control
- A media and photo gallery system
- Ongoing hosting, backups, and security already in place and already working
Future updates
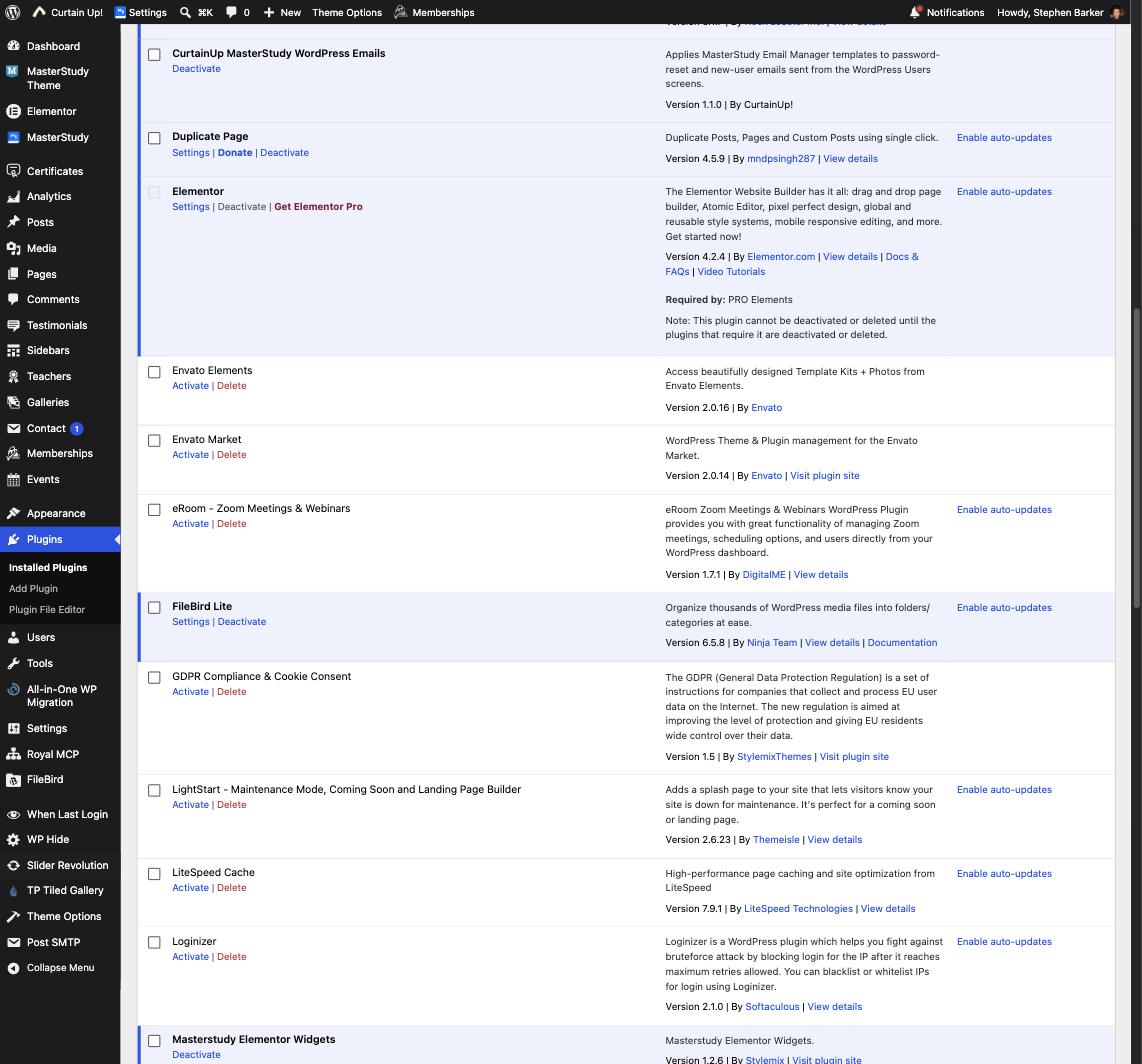
CurtainUp runs on MasterStudy, the same course platform used by training providers worldwide, and it has more capability than is currently switched on here. These are features already available to this site that have not been set up yet.
 Click the image to enlarge it
- A native mobile appMasterStudy has a dedicated companion app for learners. This would sit alongside the mobile friendly website rather than replace it, and would need to be set up and published separately.
- Live video classesThe plugin that connects Zoom and Google Meet sessions to a course is already installed, but not yet turned on. Once active, an instructor could schedule a live session directly against a course.
- Deeper reportingMore detailed, exportable training reports across departments, for management review.
- Additional course toolsMasterStudy includes further options, such as gamified points and leaderboards, that have not been switched on here and would need review before use.
Get help as an instructor
If something in the course builder is not behaving as expected, or you are not sure how to structure a course, help is available.
 Click the image to enlarge it
- Check the instructor dashboardLook for the relevant section before assuming something is missing.
- Ask a colleagueSomeone in your department may have already published a course.
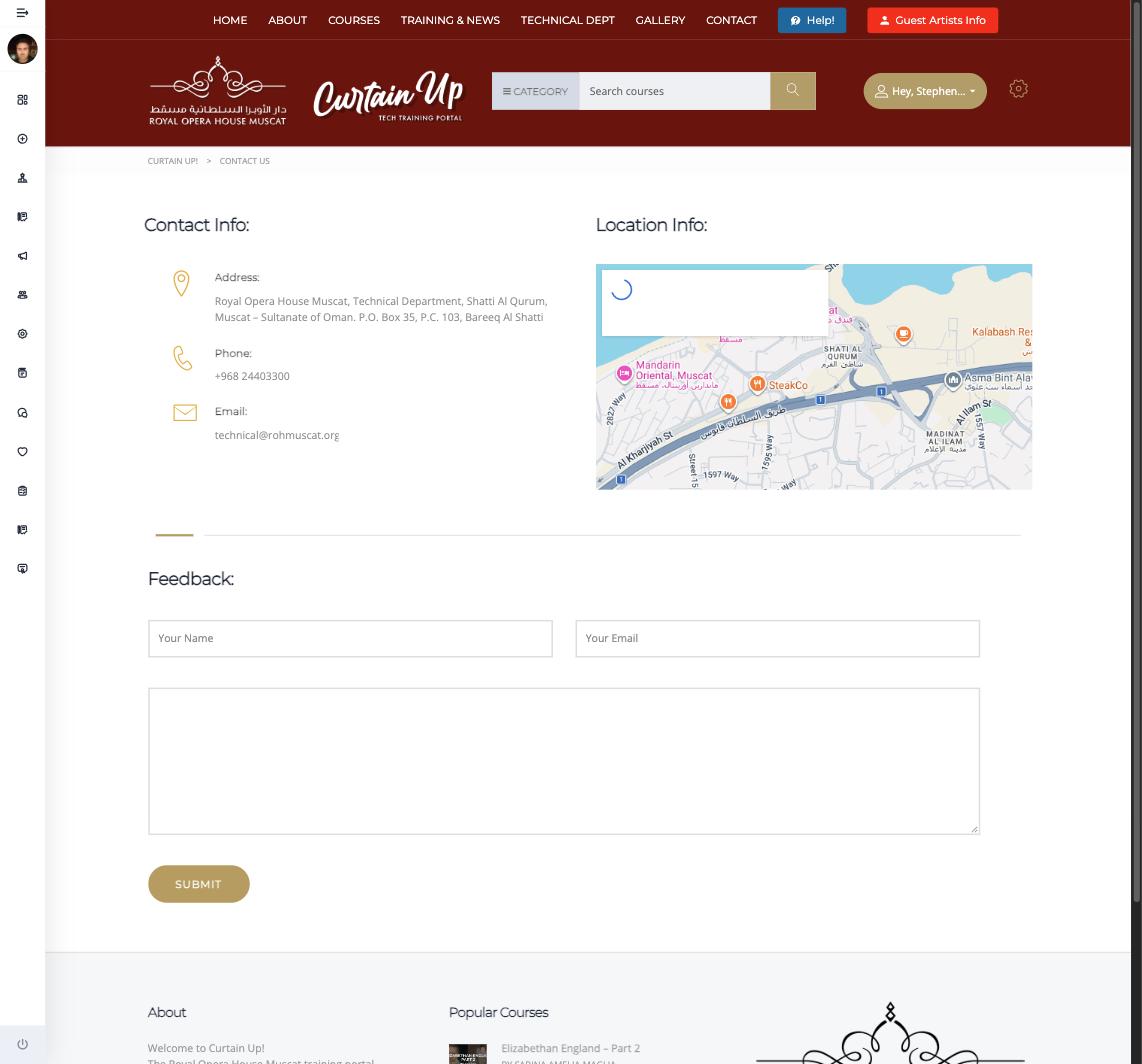
- Contact StephenCurtainUp Administrator, through the contact form, for anything technical or account related.
Build your first course today
Everything you need to create, publish, and track training is already part of this site.
Open Course Builder